Workflows
🚀 Getting Started with WorqHat Workflows
Welcome to WorqHat Workflows! This guide will walk you through the process of creating, configuring, and launching your first automated workflow — no coding experience required.
📝 Step 1: Login and Access Workflows
- Go to worqhat.app
- Login to your organization account.
- Navigate to “Workflows” from the dashboard or sidebar.
⚙️ Step 2: Create a New Workflow
- Click on “Create Workflow”.
- You’ll be redirected to the Workflows Page, where all your workflows are listed.
- Click on “Create New” — this opens a modal asking for the workflow name.
⚡ Step 3: Choose a Trigger
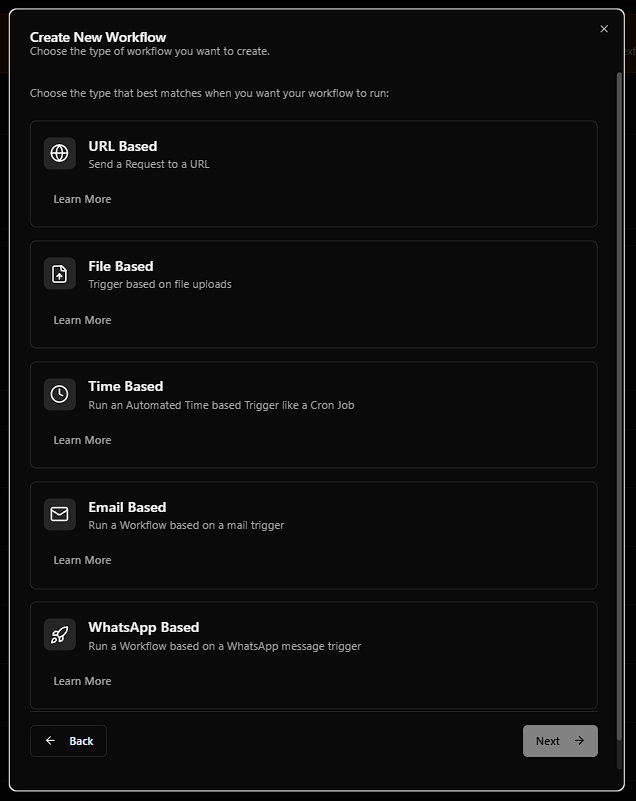 A Trigger is how your workflow is started. Select one of the following:
✅ Supported Trigger Types:
- URL-based: Start the workflow by making an HTTP request to a provided URL.
- File-based: Similar to URL-based, but allows uploading a file with the request.
- Time-based: Works like a cron job. Trigger it at regular intervals (seconds, minutes, hours).
- Email-based: Send an email to a unique address to trigger the workflow.
- WhatsApp-based: A message sent to a specific WhatsApp number will start the workflow.
✍️ Step 4: Describe Your Workflow (Optional)
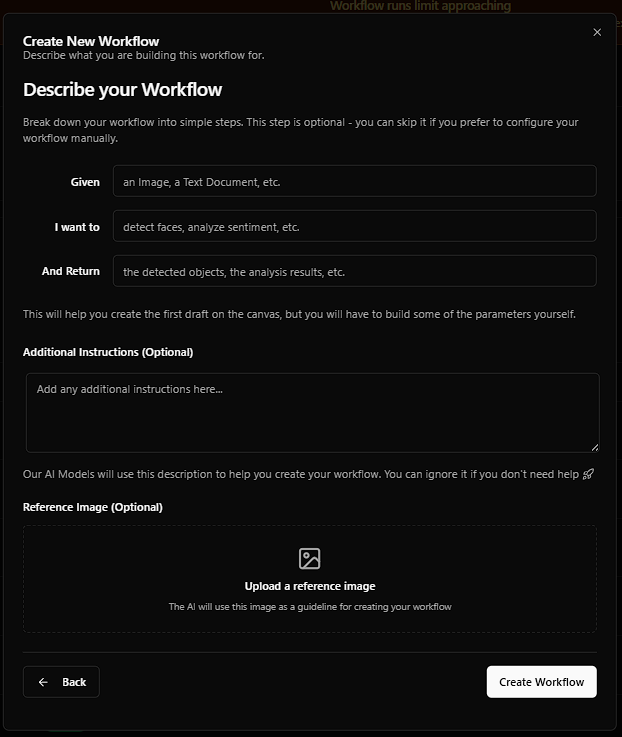 You’ll now see an optional modal to describe your workflow, which helps WorqHat’s AI assistant generate the first draft:
🧠 AI Description Fields:
- Given: e.g., “an Image, a Text Document, etc.”
- I want to: e.g., “detect faces, analyze sentiment, etc.”
- And return: e.g., “the detected objects, the analysis results, etc.”
- Additional Instructions (Optional)
- Reference Image (Optional)
🎨 Step 5: Canvas — Build Your Workflow
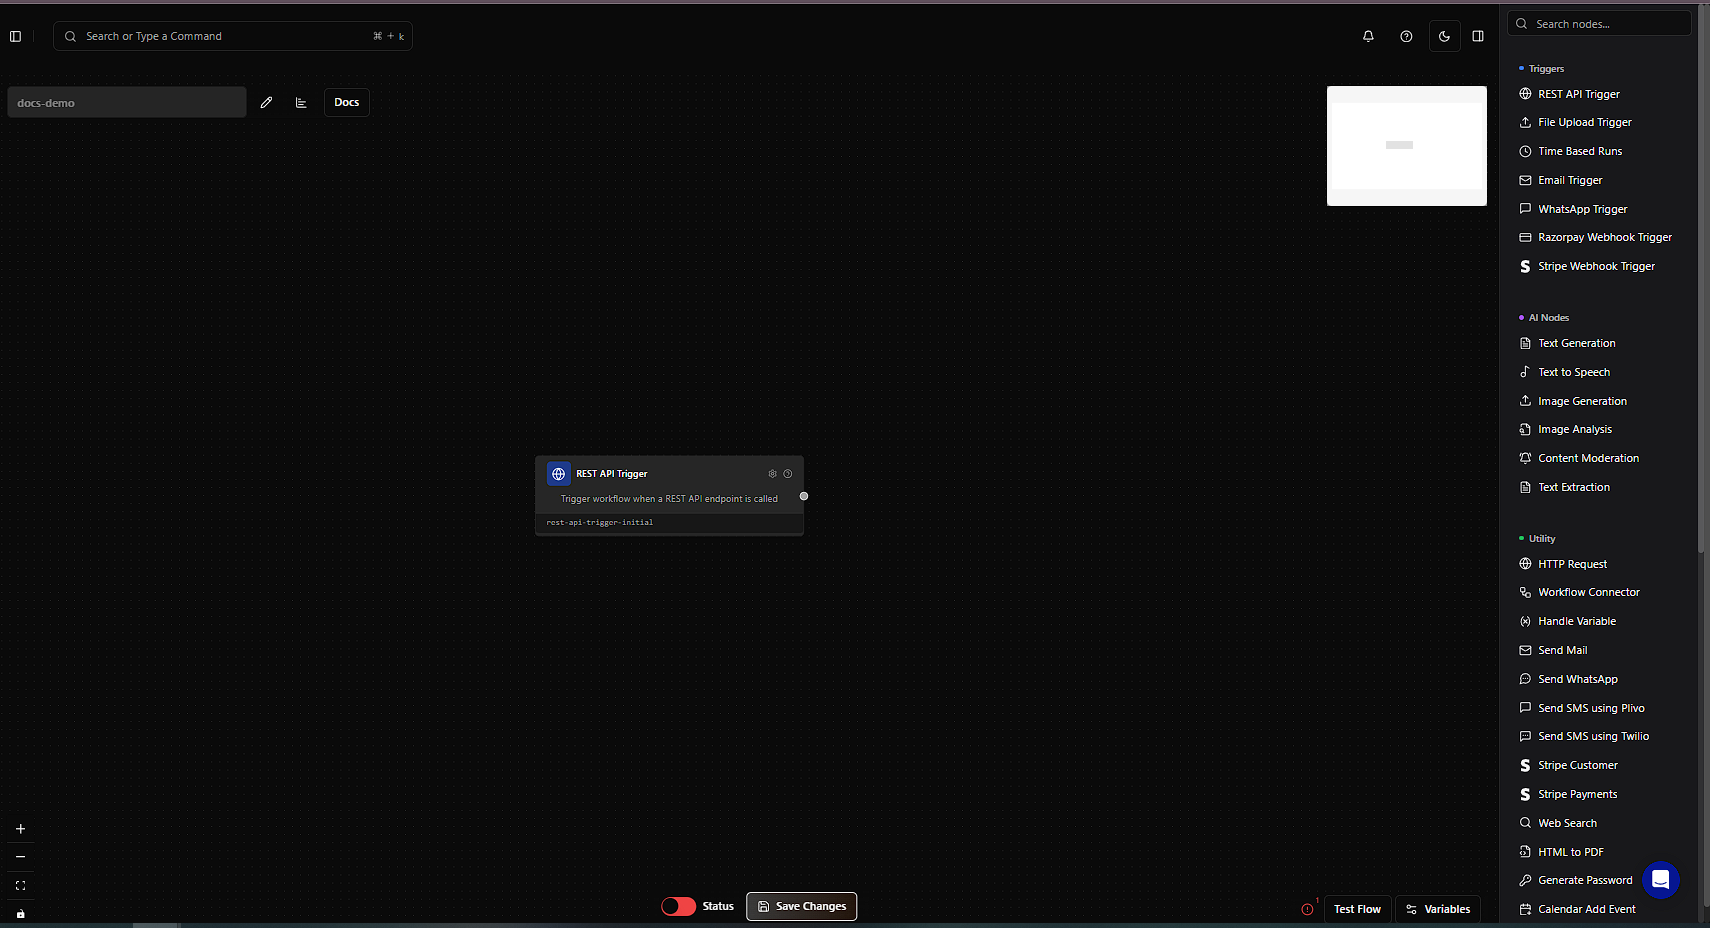 Whether you used the AI or not, you’ll be taken to the Workflow Canvas:
- Use the right-hand sidebar to drag and drop nodes.
- Connect nodes in the desired flow.
- Click on a node to configure it and use variables via the
{}button in node settings.
🔧 Step 6: Configure Docs and API Access
- Click on the “Docs” button (next to Analytics).
- WorqHat will provide:
- Suggested API Key
- Your workflow endpoint
- Click on “Generate Document” for code examples in:
- Python
- Node.js
- cURL
- and more…
✅ Step 7: Activate and Save Your Workflow
- Switch the status from 🔴 Red (Inactive) to 🟢 Green (Active).
- Click “Save Changes” to preserve your work.
🧪 Step 8: Test Your Workflow
Use the built-in “Test Flow” button to test your workflow — no website or Postman required.📦 Variables and Storage
You can define variables in your workflow to store and reuse information between steps — just like memory cells in a program. These are extremely helpful when:- You want to pass values (like user input or file content) from one node to another.
- You need conditional branching or custom logic.
- You want to reduce hardcoding and make your workflows dynamic.
🔧 How to Access Variables
Use the{} button inside any node’s input field to reference a variable.
💡 Example: Setting a Limit
Suppose you’re checking whether a submitted number exceeds a limit of 50.-
Variable Node
Set a variable calledlimitwith value: 50 -
Condition Node
Use an expression like: inputNumber > limit -
Message Node (If True)
Message: The value exceeds the limit of limit.
📊 Analytics
- Click on “Analytics” to see logs and performance metrics of your workflow.
🧠 Summary
| Feature | Description |
|---|---|
| Drag-n-Drop Canvas | Build workflows visually |
| Trigger Types | URL, File, Email, WhatsApp, Time |
| API + Docs | Auto-generate code and API keys |
| Manual & AI Build | Supports both methods |
| Variable Support | Dynamic inputs/outputs |
| Built-in Tester | No Postman needed |
📍 Example Use Cases
- Lead Generation: Receive WhatsApp leads and analyze sentiment.
- File Parser: Upload Excel sheets and extract structured data.
- Email Classifier: Send emails to a workflow that tags spam or priority.